友情提示点击顶部放大镜 可以使用站内搜索 记住我们的地址 www.hainabaike.com

这个计算器由一个 LCD1602 屏幕和一个 Arduino UNO 组成,可以实现遥控输入数字进行加减乘除的运算。我知道,这没有意义,好吧,我没有键盘,但是我有红外遥控器和接收器,所以我想,为什么不应该将遥控器用作键盘。
这个例子是学习 LCD1602 和遥控驱动的很好的范例。
所需材料如下:
Arduino UNO R3
LCD1602 液晶屏
红外线接收器
220 欧姆电阻
1k 欧姆电阻2个
红外遥控器
Arduino 库:
IRremote by shirriff, z3t0, ArminJo – v2.5.0
LiquidCrystal by Arduino, Adafruit – v1.0.7
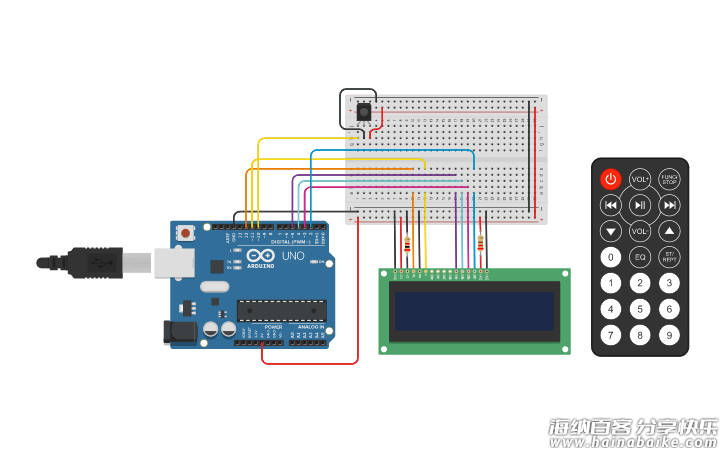
原理图
连接方式如下表
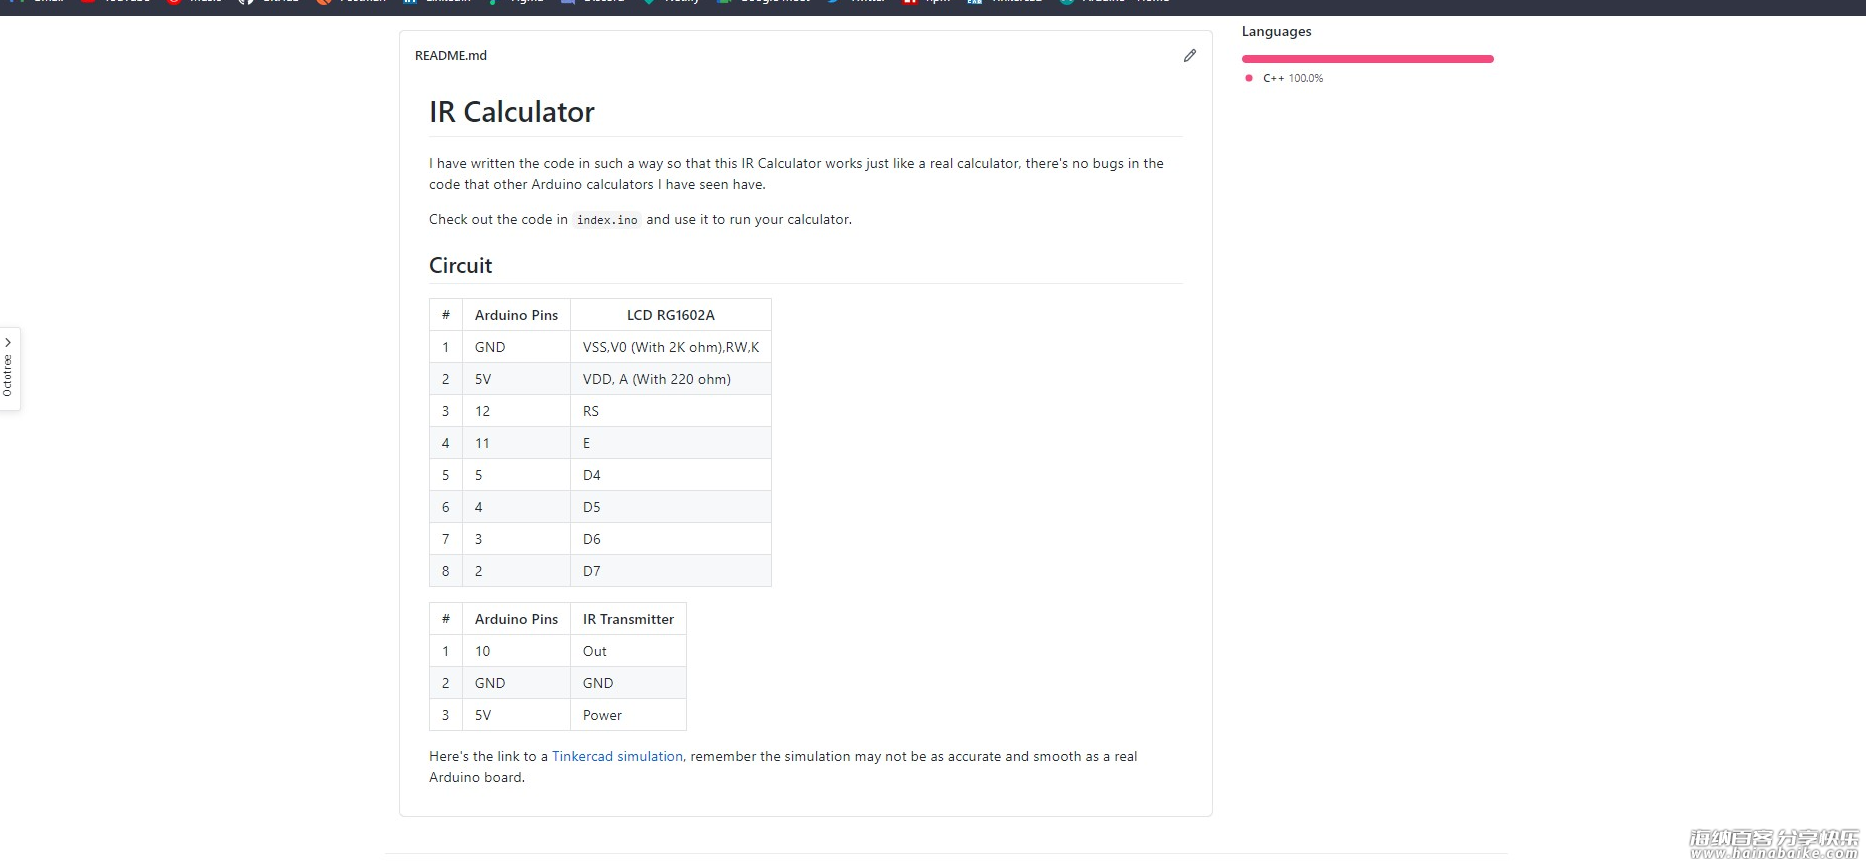
https://github.com/Jaagrav/IRcalculator/
编程
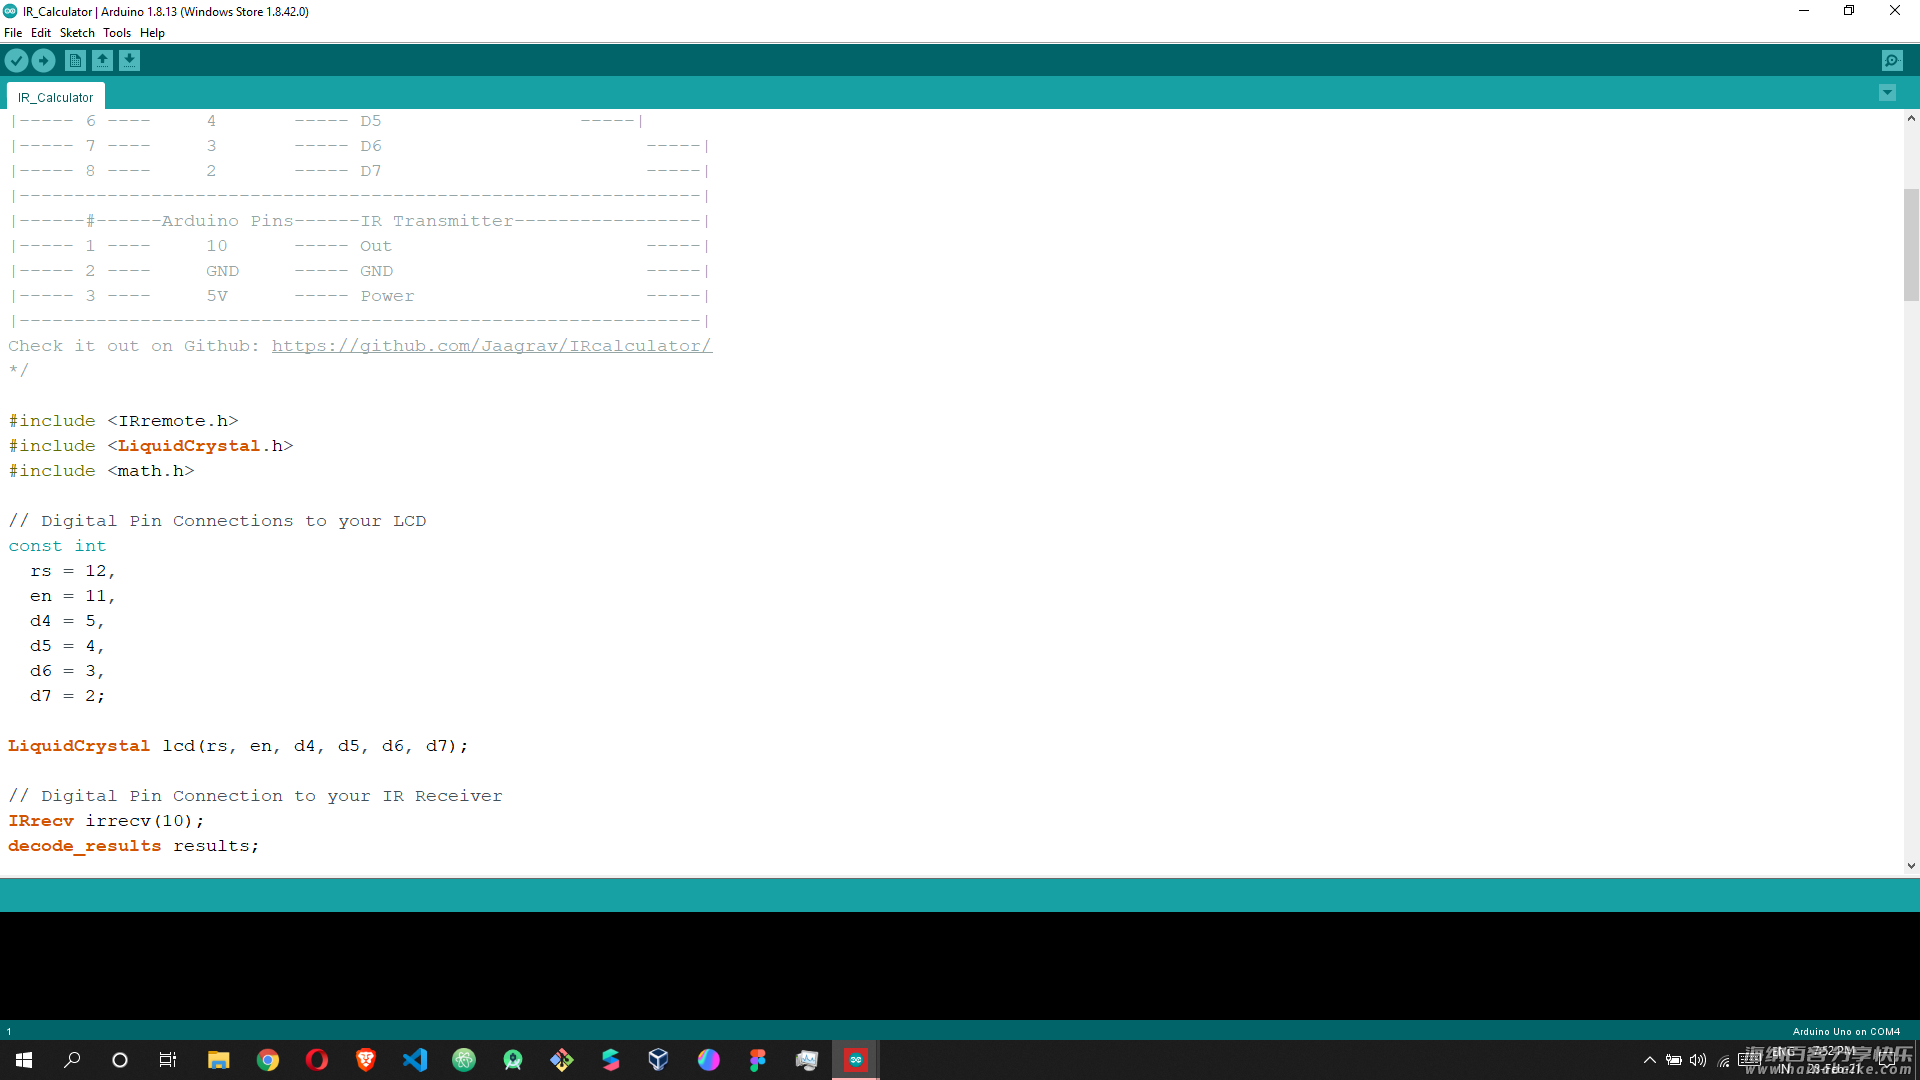
这是使遥控计算器正常工作所需的代码。只需将代码复制并粘贴到您的 Arduino IDE 中,现在我在代码中留下了一些注释。
/*
This is an IR Remote Controlled Calculator.
I have tried to get rid of all the bugs that I have seen
in other calculators made using an arduino. This calculator
can be used like a normal calculator, you can make
simultaneous calculations with this, add points, etc.
The LCD Display used here is a RG1602A,
you may refer to this article to understand how to use the display,
https://create.arduino.cc/projecthub/najad/interfacing-lcd1602-with-arduino-764ec4
All you need to do is connect the wires in the corresponding
pins written down below and edit the IR Codes:
|------#------Arduino Pins------LCD RG1602A--------------------|
|----- 1 ----     GND     ----- VSS,V0 (With 2K ohm),RW,K -----|
|----- 2 ----     5V      ----- VDD, A (With 220 ohm)     -----|
|----- 3 ----     12      ----- RS                        -----|
|----- 4 ----     11      ----- E                         -----|
|----- 5 ----     5       ----- D4                        -----|
|----- 6 ----     4       ----- D5                  -----|
|----- 7 ----     3       ----- D6                        -----|
|----- 8 ----     2       ----- D7                        -----|
|--------------------------------------------------------------|
|------#------Arduino Pins------IR Transmitter-----------------|
|----- 1 ----     10      ----- Out                       -----|
|----- 2 ----     GND     ----- GND                       -----|
|----- 3 ----     5V      ----- Power                     -----|
|--------------------------------------------------------------|
Check it out on Github: https://github.com/Jaagrav/IRcalculator/
*/

#include <IRremote.h>
#include <LiquidCrystal.h>
#include <math.h>

// Digital Pin Connections to your LCD
const int
  rs = 12,
  en = 11,
  d4 = 5,
  d5 = 4,
  d6 = 3,
  d7 = 2;

LiquidCrystal lcd(rs, en, d4, d5, d6, d7);

// Digital Pin Connection to your IR Receiver
IRrecv irrecv(10);
decode_results results;

String
  number1 = "0",
  number2 = "0",
  optr = "=",
  sixteenString = "                ";

/*
In the below switch-case replace the numbers with the IR codes
from your remote. Make sure you write the code that gets printed
in your serial monitor from line 142.
*/

void acceptInput(int character) {
  Serial.println(character);
  switch(character) {
    case 2222:
      concatNumbers("1");
    break;
    case -31092:
      concatNumbers("2");
    break;
    case 18888:
      concatNumbers("3");
    break;
    case 10000:
      concatNumbers("4");
    break;
    case -22203:
      concatNumbers("5");
    break;
    case 26666:
      concatNumbers("6");
    break;
    case 6333:
      concatNumbers("7");
    break;
    case -25537:
      concatNumbers("8");
    break;
    case 22222:
      concatNumbers("9");
    break;
    case 12222:
      concatNumbers("0");
    break;
    case 28888:
      concatNumbers(".");
    break;
    case 255:
      number1 = "0";
      number2 = "0";
      optr = "=";
    break;
    case 32222:
      function("+");
    break;
    case -28870:
      function("-");
    break;
    case 24444:
      function("/");
    break;
    case 8444:
      function("x");
    break;
    case 45555:
      if(optr != "=")
        calculate("=");
    break;
    case 4333:
      backSpace();
    break;
    default:
    Serial.println("Invalid Input");
  }
}

void setup() {
  Serial.begin(9600);

  lcd.begin(16, 2);
  irrecv.enableIRIn();
}

void loop() {
  if (irrecv.decode(&results)) {
    unsigned int result = results.value;
    String val = String(result);
    acceptInput(val.toInt());
    irrecv.resume();
  }
  lcd.setCursor(0,0);
  lcd.print(optr + "  " + sixteenString.substring(number1.length() + 3) + number1);
  lcd.setCursor(0,1);
  lcd.print(sixteenString.substring(number2.length()) + number2);
}

void calculate(String op) {
  double no1 = number1.toDouble();
  double no2 = number2.toDouble();
  double calcVal = 0.0;

  if(optr == "+")
    calcVal = (no1 + no2);
  else if(optr == "-")
    calcVal = (no1 - no2);
  else if(optr == "x")
    calcVal = (no1 * no2);
  else if(optr == "/")
    calcVal = (no1 / no2);

  number1 = toString(calcVal);
  number2 = "0";
  optr = op;
}

String toString(double num) {
  return String(num);
}

void function(String e) {
  if(number1 != "0" && number2 != "0") {
    calculate(e);
  }
  else if(number1 == "0") {
    number1 = number2;
    number2 = "0";
  }
  optr = e;
}

void concatNumbers(String num) {
  if(optr == "=")
    number1 = "0";
  if(num != "."){
    if(number2.length() == 1 && number2 == "0")
       number2 = num;
     else
       number2 += num;
  }
  else {
    if(number2.charAt(number2.length()-1) != '.' && number2.indexOf('.') == -1)
      number2 += num;
  }
}

void backSpace() {
  number2 = number2.substring(0, number2.length() - 1);
    if(number2 == "")
      number2 = "0";
}
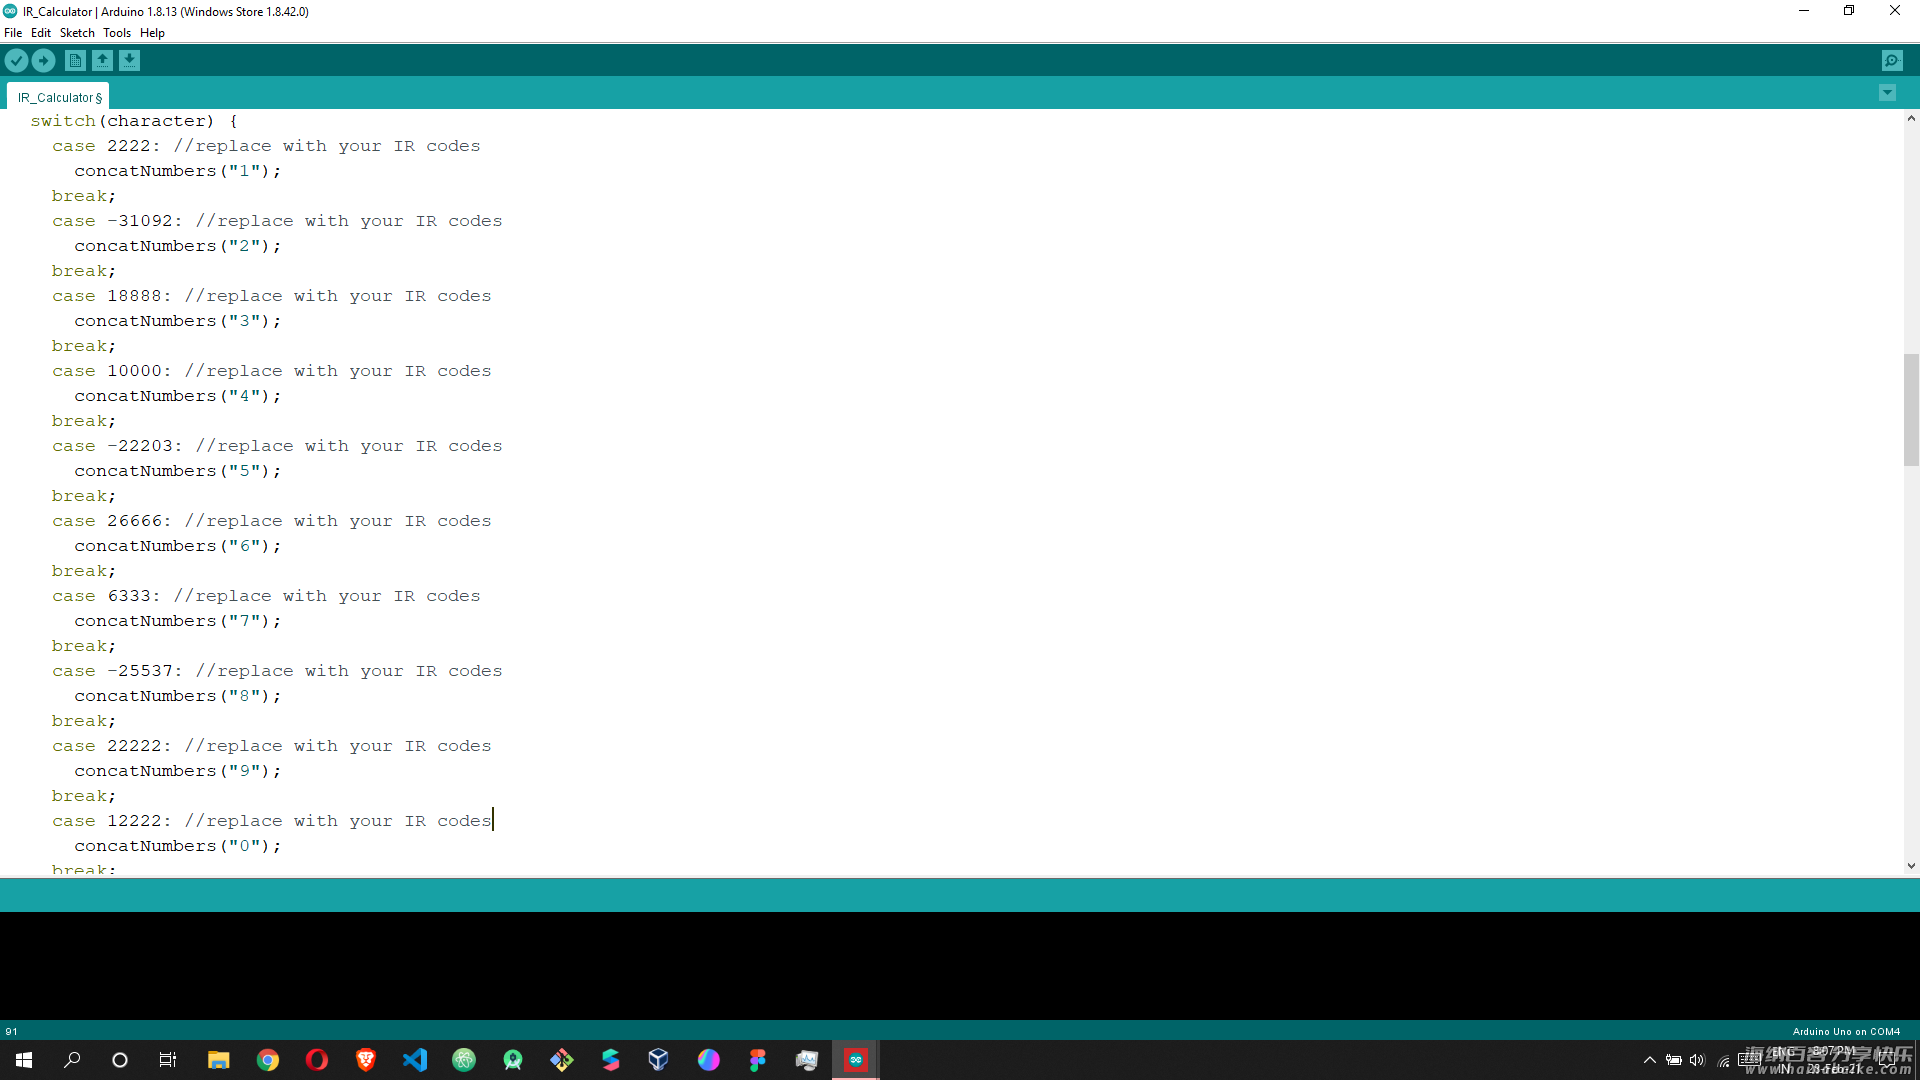
打开 Arduino IDE 的串口监视器(CTRL + SHIFT + M)。上传代码到 Arduino 之后,用遥控器对准红外接收头按下某些按键。可以观察到串口监视器会出现数字。
你可以需要根据你手上的遥控重新定义遥控器上的按键和功能的关系,那就修改上面的代码吧。效果见下面视频。
via




评论列表